THE BLACK RIVER VALLEY MODEL RAILROAD WEBSITE


THE LAYOUT
The Black River Valley Railroad is a modified version of Rick Selby's Callahan Central Layout in HO-scale. A ten by four-foot, one-half-inch plywood deck is mounted on a one by four and one by six-inch frame. The train table is mounted on garage door rollers which move on tracks fixed to the walls of the train room. Although you have to duck under the table to reach the back side, this arrangement allows for access to the back (South) side of the layout for construction, maintenance and operation. I tried legs and casters on the table, but the legs were always in the way and the casters were hanging up in the carpet on the floor. So far the garage door roller system has worked out quite well. Check my How'd You Do That page for a photograph of the roller installation!
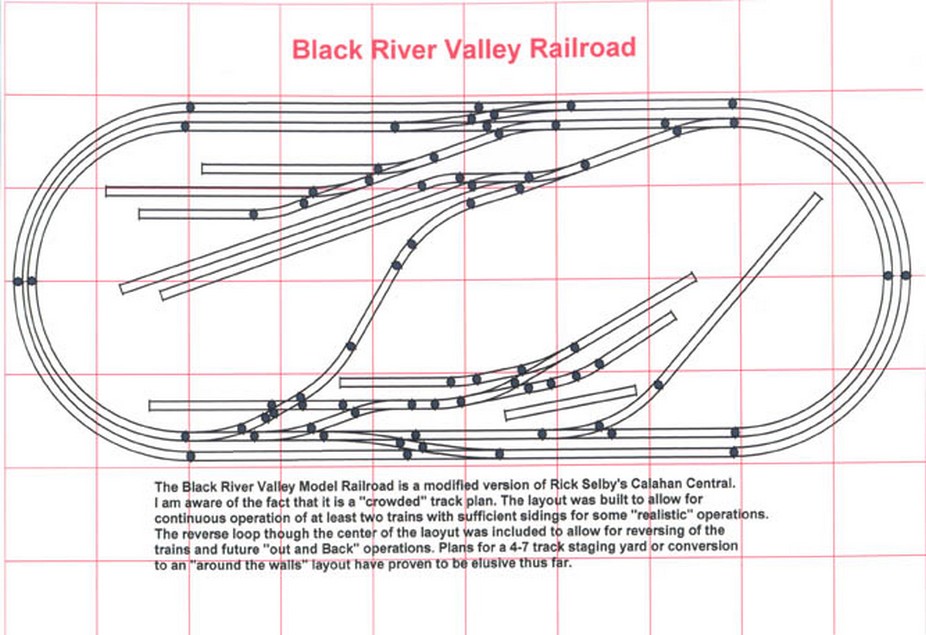
The BRVRR has a double track main line with a reversing loop on the inner main. There is a three-track engine facility, a yard with two long sidings, four sidings for commercial traffic and a siding for the grain elevator. The sectional track shown in the Track Plan at right has been replaced with Atlas Code-100 Flex-Track. The track is laid on cork roadbed on the main lines and on quarter-inch foam board everywhere else. The turnouts, with the exception of the #6 Atlas turnouts on the crossovers, are Atlas Snap Switches to save space. About half of the switches are remotely controlled, the remainder are manually controlled with Caboose Industries No. 205S ground throws.
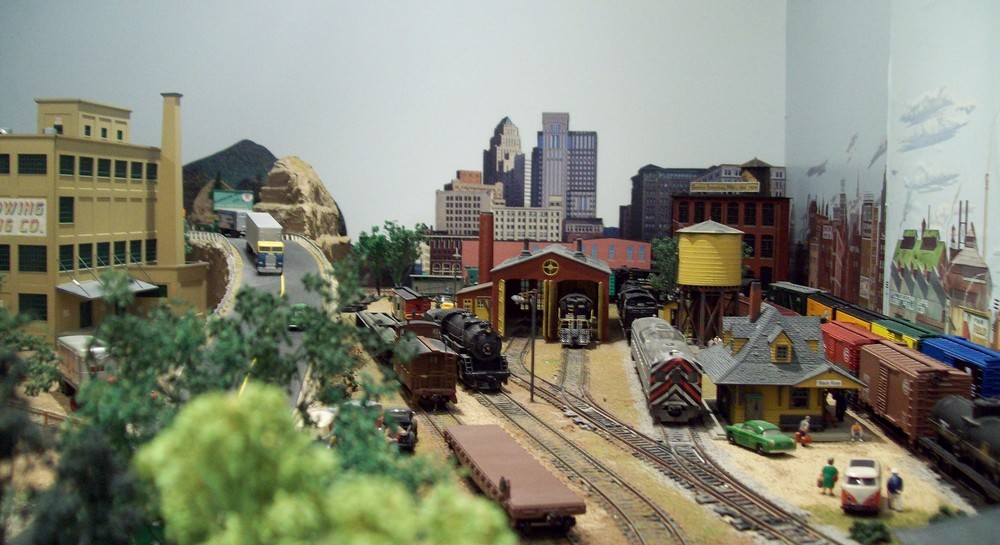
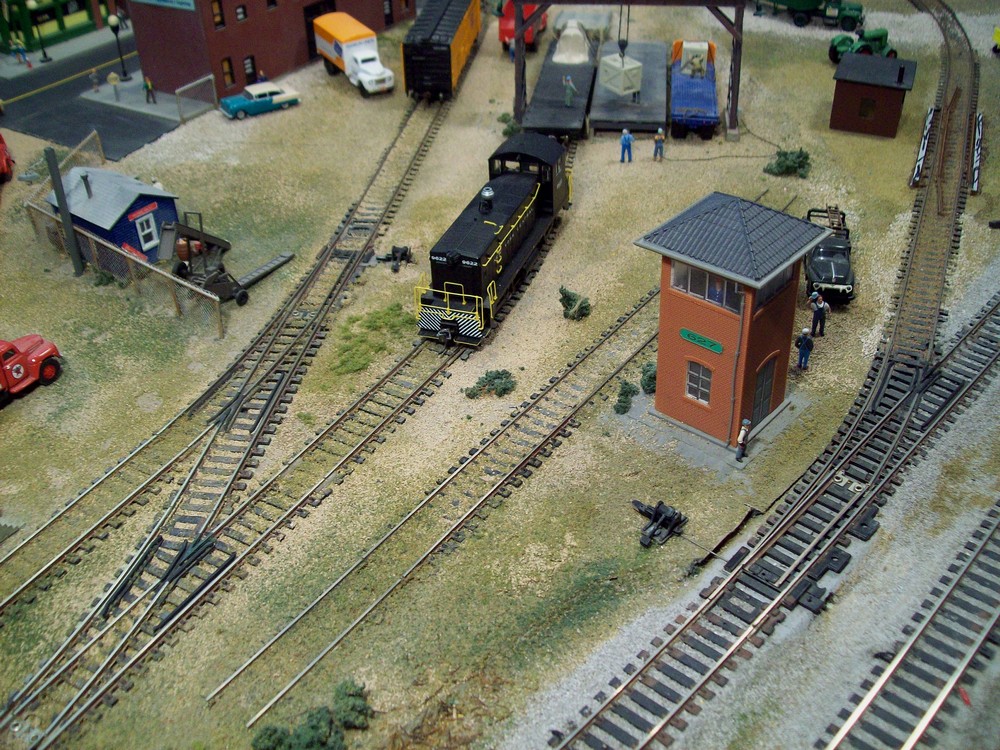
The thumbnail photograph at left shows most of the East end of the Black River Valley layout, viewed from the South side of the table as of February 2014. In the center background is the General Industries building, and the east end backdrop. The two yard sidings and engine terminal are visible in the center with the water tower and the Black River Depot in the right foreground.. The roadway viaduct with guard rails and the highway bridge extend to the top left edge of the layout in front of the forested hill in the backdrop. The Redwing Flour Mill is at the left. The Barron Oil Company is at left, out of sight behind the trees. For a larger view 'click' on the thumbnail.
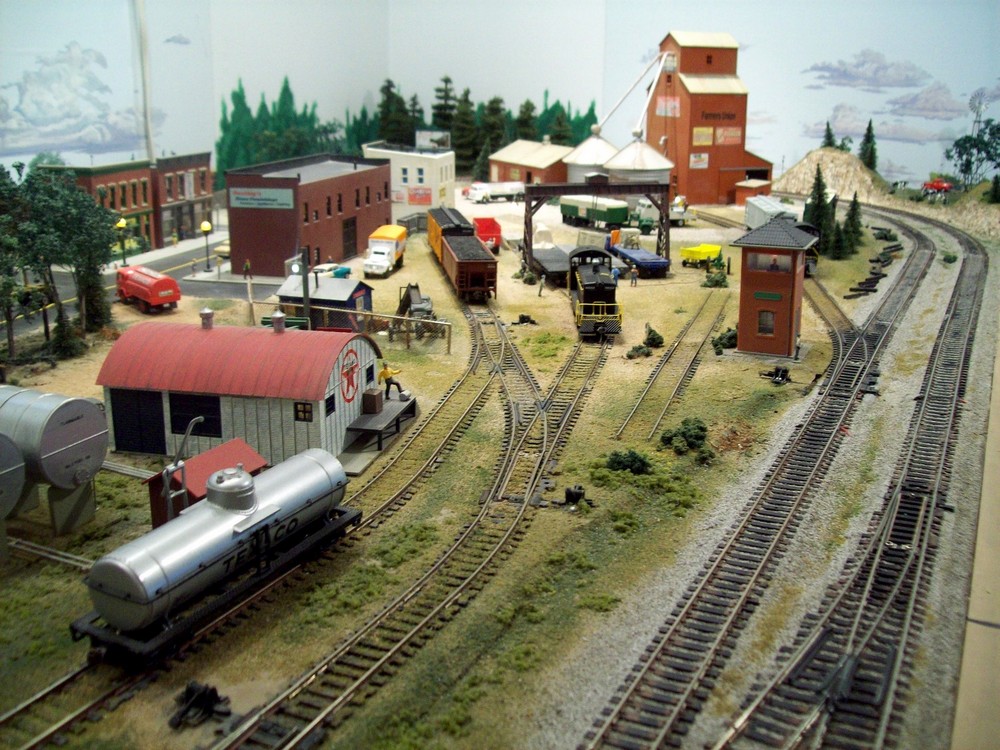
The thumbnail photograph at right shows the West end of the Black River Valley layout as of February 2014. In the distance is the Farmers Union grain elevator with its own siding. Just to the left of the elevator, near the edge of the table, is the double track highway crossing. In the center is Oosting's Furniture Store and the team tracks with overhead crane and loading dock. The white building next to the furniture store is the General Store. The Baron Oil Company is in the left center foreground. The other buildings, Judy's Bar & Grill and Michelle's Fashions, can be seen along the roadway beyond Ooostings. All of the buildings are lighted. The two of the retail stores, Oosting's Furniture and Michelle's Fashions have detailed, lighted, display windows. I'm still working on the furnishings for Judy's Bar & Grill. Grafton Tower is a right center with my pasture scene in the right background.
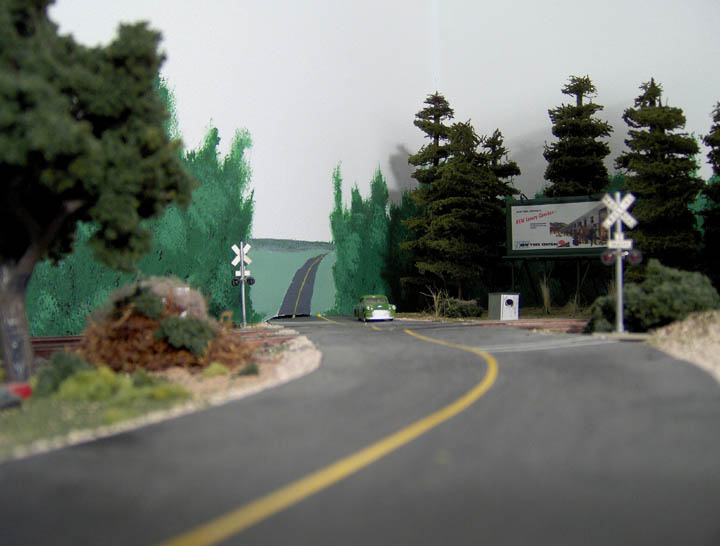
At left is a photo of the highway crossing near the Black River Valley Coop grain elevator as NYC F7 #1855 passes. The crossing was inspired by a photograph I saw on the Atlas Forum. The flange ways are a little wider than I would like, but they are necessary to allow my Niagara 4-8-4, Heavy Mike and Hudson, not to mention my grandson's Challenger, to pass over. The signals are activated by a Berkshire Junction infra-red control module. The cross bucks where part of the kit and are made of brass and plastic with red LEDs for the lights. I hid the IR light sources and detectors in foliage and home-made equipment cases at track side. A 'photo essay' on the installation of my Berkshire Junction crossing lights and control circuits is on the 'How'd You Do That' page.
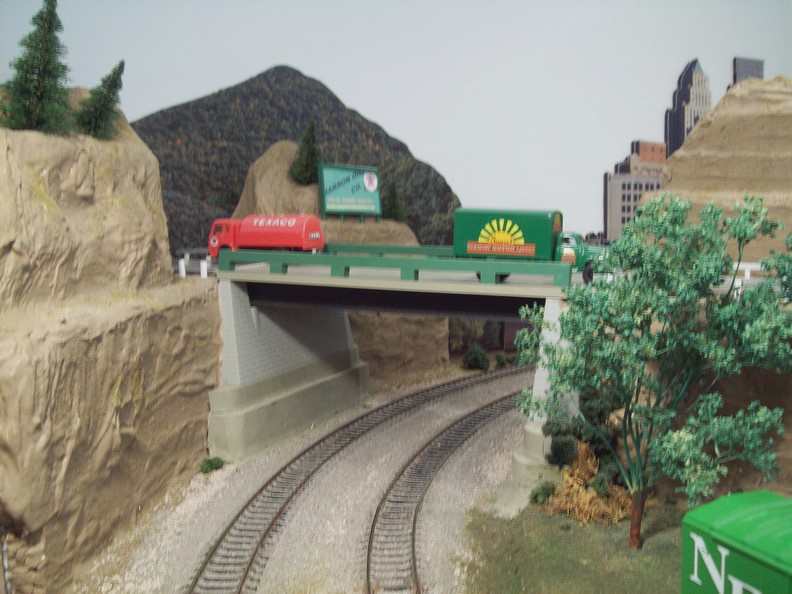
I constructed my roadway bridge from .040-inch Evergreen Sheet Styrene. The bridge abutment was made from two Atlas 3-inch Bridge Piers cut in half lengthwise and trimmed to fit on top of a couple of shaped wooden blocks. I built the I-beams (4) from the sheet styrene cut into strips. The bridge deck and approach are one piece of sheet styrene glued to the I-beams. The bridge rails were made from styrene strip stock. The bridge deck and beams can be lifted out for access to the track for cleaning and maintenance. Still some detailing and finishing to do, but it works and looks better than the slab of plywood it replaced.
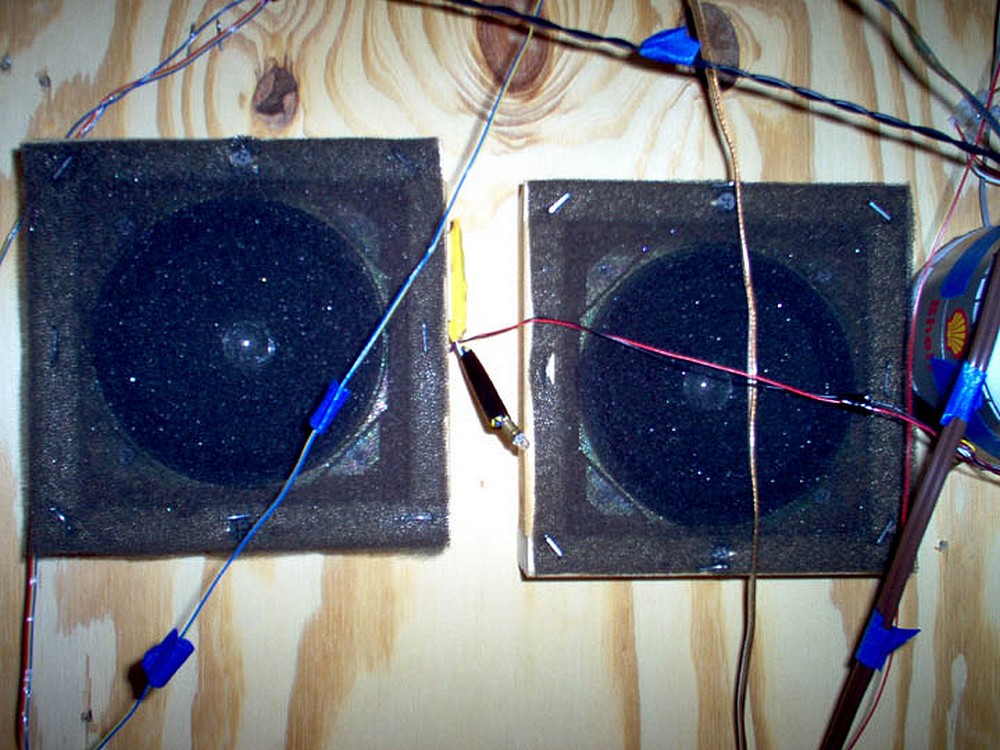
To provide a 'voice' to my non-sound equipped steam and diesel locomotives I installed sound decoders and speakers under the BRVRR train table. For the purpose, I purchased two Soundtraxx DSD100-LC decoders, a #820002 Diesel Sounds decoder and a #820001 Steam Sounds decoder. I built two wooden enclosures for a pair of 4-inch speakers I had on hand. For minimal protection and to keep the dust out, the faces of the speakers/enclosures are covered with air conditioner filter mesh. I wired a sound decoder to each speaker. I also soldered a small light bulb across the motor leads of each decoder to simulate motor load which is necessary for programming. I installed a simple switch in the track leads to each of the decoders so I can turn off the sound without deleting the decoder address from my Digitrax control system. The sound quality and CV response are quite good. For operations, I use the sound decoder's address as the top address in a consist and simply MU the desired locomotive(s) to it. Not as proto-typical as on-board sound, but effective.
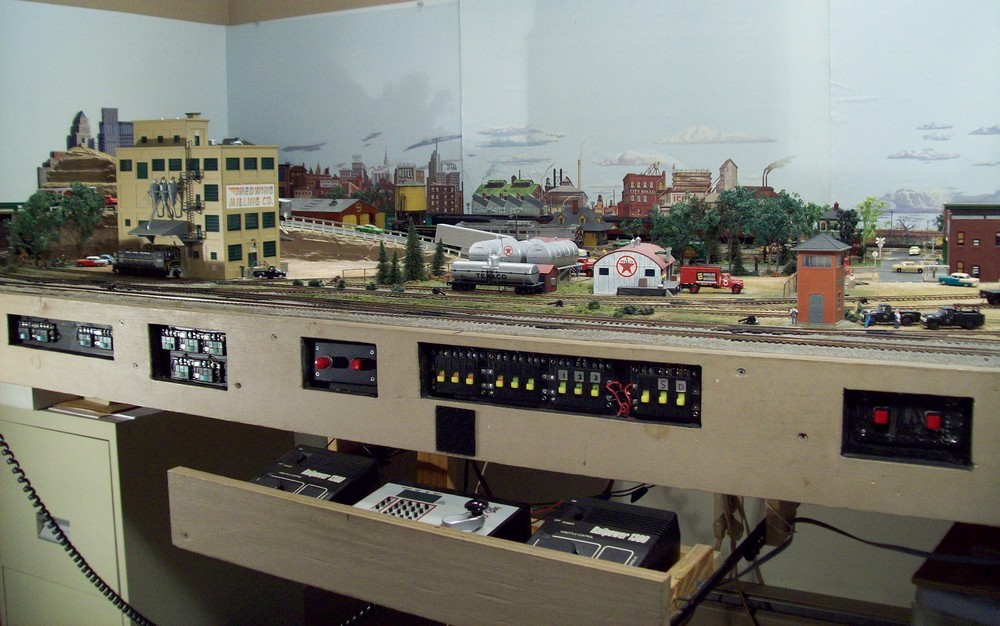
The BRVRR doesn't have a control panel as such. The main throttles and the DCS 50 are in a drawer under the layout table (See photo below). Power to the individual sidings is controlled with the Atlas Controllers (yellow switches) mounted on the front of the table. The last two controller switches at right control the under-table steam and diesel sound decoders. The red push-buttons control the street and structure lights. The Atlas slide switches at left control the cross-over turnouts and several turnouts on the back side of the layout beyond easy arm's reach. Out of the photo at left is a DT400 throttle, and to the right under the table is the cable (LocoNet) connection to my LocoBuffer-USB and home computer. The layout table is mounted on rollers on wall tracks to allow access for maintenance and operation from behind the table when desired.
I have had many questions about the location of my programming track. Although it is shown above in the track plan I thought more direct action was needed. The thumbnail at left will lead to a larger photo of my 'disguised' programming track. It is pretending to be an abandoned siding between Grafteon Tower and the switch engine on the team track siding. It is fully isolated from the rest of the layout and was sized to accept a Challenger, Niagara or other large steamer.
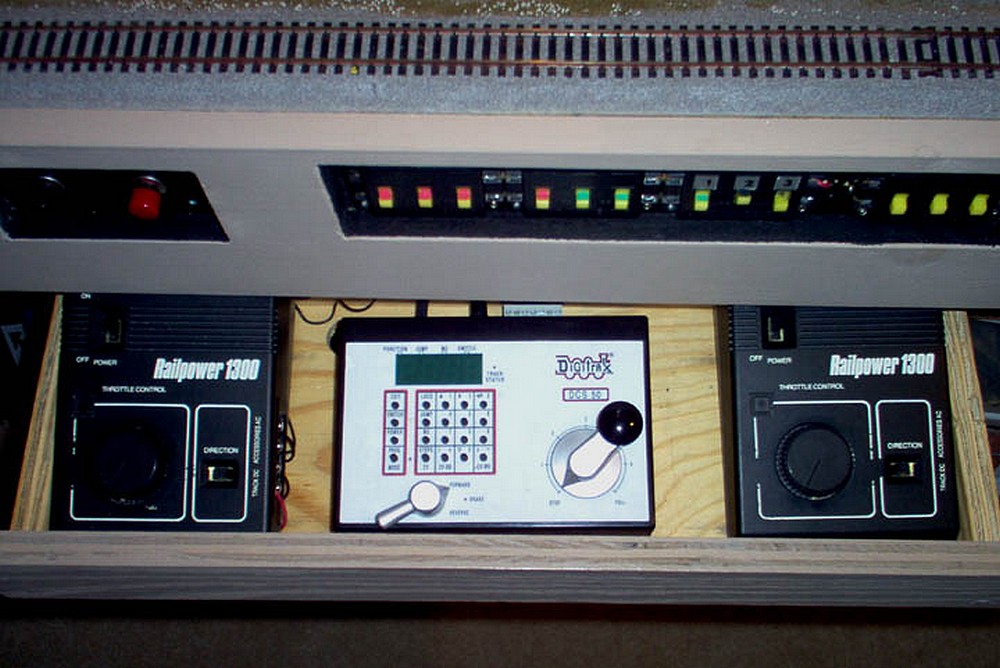
A Digitrax, DCS-50, Zephyr provides the power and controls the trains on the BRVRR. There are two MRC Railpower 1300 power-packs connected to the jump ports on the Zephyr command station. This arrangement provides the operator(s) with three individual throttles for the trains. One of the MRC power-packs powers the switch motors the other powers the street lights and structure lights. A small 'train set' power supply provides the power for the crossing lights and train detector. The thumbnail at right shows the layout of the command station and MRC power packs.
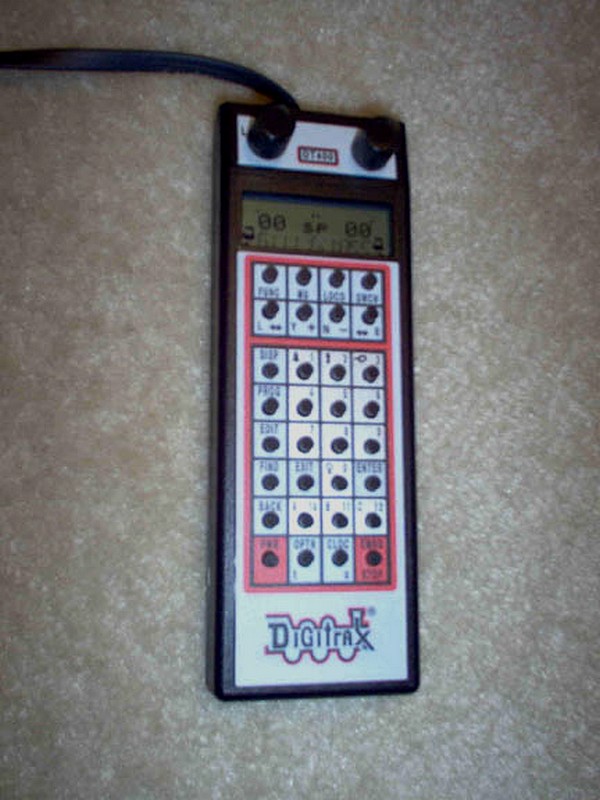
I added a Digitrax DT400 throttle to the BRVRR Layout to provide more flexibility and better control. With the throttle plugged into the Zephyr, I can now take my throttles with me to the back (North) side of the layout. The DT400 gives me much finer throttle control and I can even program an operating engine in OPS Mode on the main line. I'm still learning all it can do, though I doubt I'll ever use all of the features on the Black River Valley Railroad. So far the DT400 is proving to be worth the investment.
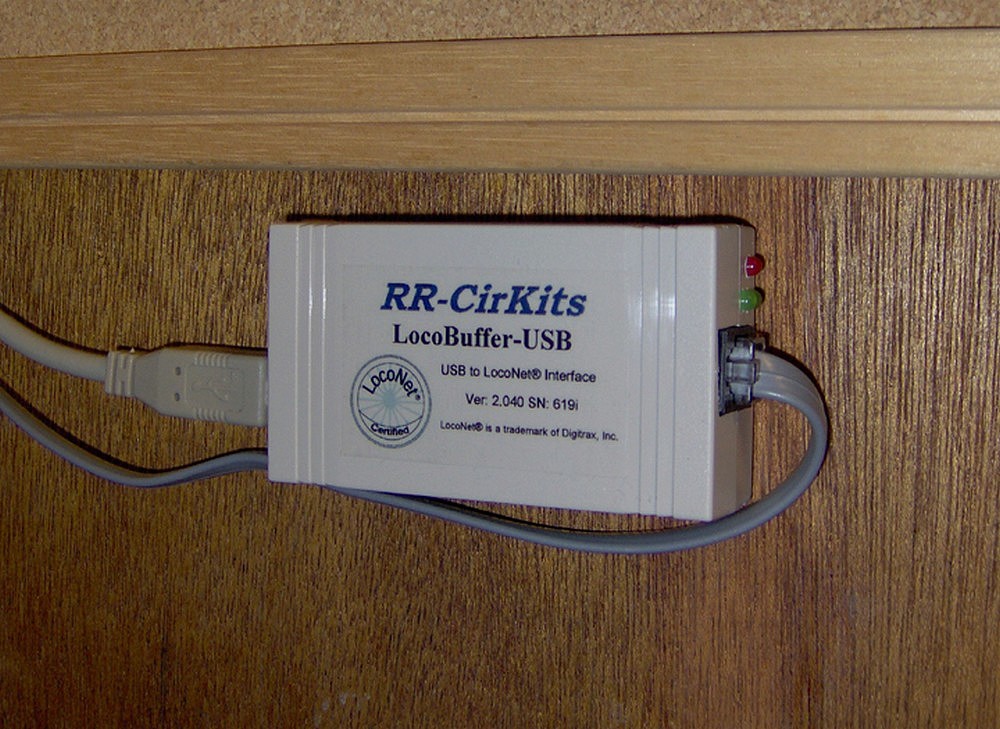
I thought about programming my locomotives with DecoderPro and running the layout with ControlPanel for a long time. My 2008 Christmas present to me was the LocoBuffer-USB shown at right. After installing the software and figuring out a Com Port problem, the unit and JMRI programs worked as advertised. I still have a lot to learn, but so far, programming decoders and running the layout with my personal computer as simplified the programming chores considerably and has turned out to be fun.